Real Estate Photo Editing: 5 Tips to Make Properties Look Irresistible
July 29, 2025
In real estate, the first showing doesn’t happen at the front door; it happens online. Long before a potential buyer schedules a visit, they are scrolling through listings, and their first impression is based entirely on the photographs. Dark, crooked, or color-distorted photos can make even the most beautiful home look unappealing, causing buyers to scroll right past. Professional-quality photos are not a luxury; they are an absolute necessity for a successful sale.
The goal of real estate photo editing is to make a property look its absolute best while remaining realistic and true to life. It’s about presenting a home in a way that is bright, welcoming, and allows buyers to envision themselves living there. This guide provides five essential editing tips that will make your property listings stand out and attract more potential buyers.
1. Straighten Your Lines: The Foundation of Professionalism
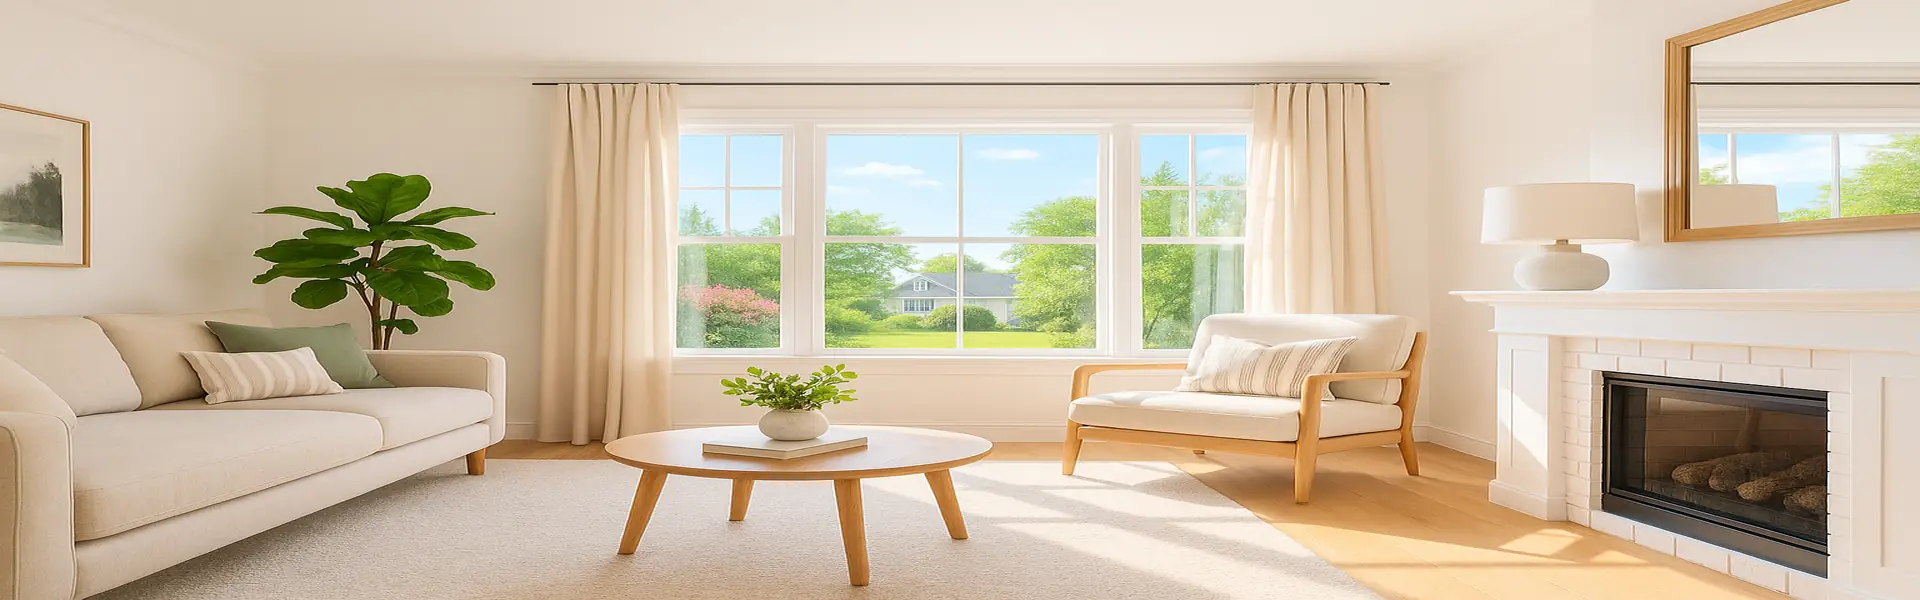
The Problem: When you photograph a room, especially with a wide-angle lens, vertical lines like walls, door frames, and windows can appear to bend or converge, an effect known as perspective distortion. Crooked, leaning walls look unprofessional and can be disorienting to the viewer.
The Fix: This is the most important first step. Use your editor’s **straighten and perspective correction tools**.
- Straighten the Horizon: Ensure any horizontal lines are perfectly level.
- Correct Vertical Distortion: Use the vertical perspective correction tool to make sure all vertical lines are perfectly straight and parallel. A professional real estate photo should have walls that are perfectly upright. This single adjustment instantly makes a photo look more professional and stable.
2. Bright and Airy Sells: Master Your Exposure
The Problem: Interiors are often dark, and relying on a camera’s flash can create harsh shadows and an unnatural look. Photos with dark corners and dimly lit rooms feel gloomy and small.
The Fix: Your goal is to create an image that feels bright, open, and airy.
- Increase Exposure: Don't be afraid to push the brightness. A bright room feels larger and more welcoming.
- Lift the Shadows: This is crucial for interiors. Use the shadows slider to brighten up the dark corners of the room and reveal detail in dimly lit areas.
- Recover Highlights: The view outside the windows is often much brighter than the interior, causing the windows to look like blown-out white squares. Use the highlights slider to pull back the brightness and recover the detail of the view outside. This makes the home feel more connected to its surroundings.
3. Get the Colors Right: Perfect White Balance
The Problem: Almost all interior lighting (lamps, overhead lights) is warm and will cast a strong yellow or orange color onto the walls and furniture. This can make a room look dated and dingy.
The Fix: Achieving a clean, natural color palette is essential.
- Correct the White Balance: This is non-negotiable. Use the white balance tools (eyedropper or temperature/tint sliders) to remove the artificial color cast. The goal is to make white walls look truly white, not yellow. This instantly makes a space feel cleaner and more modern.
- Boost Vibrance: After correcting the white balance, a touch of vibrance can make the colors of furniture, artwork, or outdoor greenery pop in a natural and appealing way.
4. A Window to the World: The View Matters
The Problem: As mentioned, the brightness difference between the interior and exterior often results in windows that are completely white and blown out, which looks unprofessional.
The Fix (Standard): The highlight recovery technique mentioned above is the first step. For many photos, this is enough to show that there is a pleasant view outside.
The Fix (Advanced - HDR/Flambient): Professional real estate photographers use more advanced techniques. They often take multiple photos at different exposure levels (one exposed for the room, one for the windows) and blend them together in post-production. This High Dynamic Range (HDR) or "Flambient" (flash + ambient) technique results in a perfectly lit room with a crystal-clear, perfectly exposed view outside the window. While complex, it’s the gold standard for high-end listings.
5. Add the Finishing Touches: Sharpness and Lens Correction
The Problem: Photos can sometimes look a bit soft, and wide-angle lenses can introduce subtle distortions.
The Fix:
- Apply Sharpening: A final pass of sharpening will make the details of the home—like wood grain, countertops, and fixtures—look crisp and high-quality.
- Enable Lens Corrections: Most good editors have a feature to automatically correct for the specific distortion and vignetting caused by the camera lens you used. This is often a one-click fix that can subtly improve the quality of the image.
- Sky Replacement (For Exteriors): For an exterior shot taken on a dull, grey day, using an AI-powered sky replacement tool to add a beautiful blue sky can dramatically increase the curb appeal of the property. Use it ethically and choose a realistic sky.
Conclusion
Real estate photo editing is about creating a fantasy that is still rooted in reality. It’s about presenting a property in its best possible light, making it feel bright, spacious, and inviting. By mastering these five key areas—straight lines, bright exposure, clean color, clear window views, and sharp details—you can create powerful marketing images that will capture the attention of buyers, drive more traffic to your listings, and ultimately help you sell properties faster.